Recent Posts
Why Fire Drills Are Essential for Safety in Schools and Public Buildings
12/18/2024 (Permalink)
Fire drills are essential safety measures that play a critical role in ensuring the safety of students, staff, and visitors in schools and public buildings. While often viewed as routine or inconvenient, fire drills are designed to prepare individuals for emergencies, and their importance cannot be overstated. A well-executed fire drill can mean the difference between life and death in a real-life emergency situation. Here’s why fire drills are so important:
1. Promoting Preparedness and Confidence
In the event of a fire, the natural human response can be panic. Fire drills serve to combat this by promoting familiarity with evacuation procedures and increasing the confidence of those involved. Students, staff, and the general public will know exactly what to do and where to go, minimizing confusion and helping them stay calm during a real emergency. When people know the layout of the building and have practiced evacuating, they are more likely to respond effectively and safely.
2. Familiarizing Occupants with Evacuation Routes
Schools and public buildings are often large, complex structures with multiple floors, exits, and hallways. Fire drills familiarize occupants with the quickest and safest evacuation routes, ensuring that they are aware of alternate exits if the primary one is blocked by fire or smoke. Drills also highlight potential obstacles or bottlenecks that could arise during an emergency, allowing for adjustments in the evacuation plan to improve efficiency and safety.
3. Testing Fire Safety Equipment and Procedures
Fire drills are not just for the benefit of individuals evacuating the building. They are also an important opportunity to test fire safety equipment and procedures. During a fire drill, alarm systems, emergency lighting, and fire doors can be tested to ensure they function properly. The staff can also practice their responsibilities, such as guiding occupants, ensuring safe evacuation of those with disabilities, and accounting for everyone once outside. These tests and evaluations provide valuable feedback for improving safety protocols.
4. Ensuring Compliance with Safety Regulations
Fire safety regulations often require regular fire drills, especially in schools and public buildings, where large groups of people are present. These regulations are in place to ensure the safety of everyone in the building and to promote readiness for any emergency. By conducting regular drills, organizations can remain in compliance with local, state, and federal fire safety laws. Regular fire drills also provide documentation that may be required by insurance companies or safety audits.
5. Instilling Safety Awareness
For schools, fire drills are a vital way to teach children about fire safety. From an early age, students learn how to recognize fire alarms, follow instructions, and evacuate buildings safely. This creates a lifelong habit of prioritizing safety in emergency situations. It also empowers children with knowledge, reducing fear and uncertainty about what to do during a fire.
Fire drills are an invaluable tool in preparing people for the unthinkable. By familiarizing students, staff, and the public with evacuation procedures and safety protocols, they ensure that everyone is better equipped to respond to emergencies. In schools and public buildings, regular fire drills save lives by promoting preparedness, testing equipment, and enhancing safety awareness.
The Hidden Dangers of Mold in Air Ducts: Why Professional Remediation Matters
11/15/2024 (Permalink)
Mold growth in a home or business is always a concern, but one of the most overlooked places mold can thrive is within air ducts. Air ducts, responsible for circulating air throughout your building, can harbor mold, especially in areas with high humidity or poor ventilation. Once mold takes hold in your HVAC system, it can spread quickly throughout your space, affecting the air you breathe and potentially causing damage to your property.
In this blog, we will explore the hidden dangers of mold in air ducts, why it happens, and how SERVPRO® can help with professional mold remediation services.
How Mold Develops in Air Ducts
Mold requires moisture to grow, and air ducts can provide the perfect environment for mold spores to thrive, particularly in damp or humid conditions. HVAC systems, which regulate the temperature of your indoor space, can create condensation, especially if the system is improperly maintained or if there are leaks in the ductwork. The moisture buildup, combined with organic material like dust, creates the perfect breeding ground for mold.
Here are some common causes of mold growth in air ducts:
- High Humidity Levels: In regions with high humidity or during certain seasons, moisture in the air can condense inside your ductwork.
- Condensation: HVAC systems that are not properly insulated or are malfunctioning can create condensation within the ducts, providing a moist environment for mold to grow.
- Poor Ventilation: Without proper air circulation, moisture and humidity can become trapped within the duct system.
- Leaks in Ductwork: Any holes, cracks, or leaks in your duct system can allow moisture to enter, promoting mold growth.
- Clogged Drip Pans: HVAC systems often have drip pans that collect moisture. If these pans become clogged or aren't cleaned regularly, standing water can accumulate, leading to mold growth.
The Impact and Risks of Mold in Air Ducts
Mold in air ducts is particularly concerning because your HVAC system circulates air throughout your property. As mold grows, spores can become airborne and spread through the ducts, landing on various surfaces and potentially leading to more extensive mold issues.
Some potential risks of mold in air ducts include:
- Damage to Property: Mold can spread beyond your HVAC system to walls, ceilings, carpets, and furniture, causing structural and cosmetic damage over time.
- Decreased HVAC Efficiency: Mold buildup can clog and damage your HVAC system, leading to decreased efficiency. This can result in higher energy bills as your system works harder to heat or cool your space.
- Odor Issues: Mold in air ducts often produces a musty, unpleasant odor that can permeate throughout your home or business. Even after cleaning, the odor can linger if the mold is not thoroughly removed.
- Potential for Wider Spread: Because HVAC systems circulate air throughout the building, mold in your ducts can easily spread to other areas of your home or commercial property, increasing the risk of extensive mold infestations.
Mold Remediation for Air Ducts: Why Professional Help Is Important
Addressing mold in air ducts requires specialized cleaning and remediation techniques to ensure the mold is completely removed and doesn’t spread further. Attempting to clean mold yourself may lead to improper removal, allowing mold spores to remain or spread.
SERVPRO offers professional mold remediation services to thoroughly address mold issues, including mold in air ducts. Here’s how SERVPRO can help:
- Thorough Inspection: SERVPRO professionals will inspect your HVAC system and air ducts to assess the extent of mold growth and identify the source of the problem.
- Containment and Removal: Using advanced containment techniques, SERVPRO prevents mold spores from spreading to other areas of your home or business. Specialized equipment, including air scrubbers and HEPA vacuums, is used to remove mold from ducts and HVAC components.
- Duct Cleaning: SERVPRO’s expert team cleans and sanitizes the entire air duct system to remove all traces of mold and prevent future growth. They’ll also address any underlying issues, such as excess moisture or condensation, to prevent mold from returning.
- Restoration: Once the mold is removed, SERVPRO can also handle any restoration work that might be needed due to mold damage, ensuring your home or business is fully restored.
SERVPRO’s mold remediation specialists are trained to handle mold issues in air ducts and HVAC systems with precision and care. If you suspect mold in your air ducts, contact SERVPRO of Johnston County North to assess and resolve the problem before it spreads. With our expert services, we’ll restore your property and help you maintain a mold-free environment.
Restoring Water-Damaged Furniture and Belongings
10/16/2024 (Permalink)
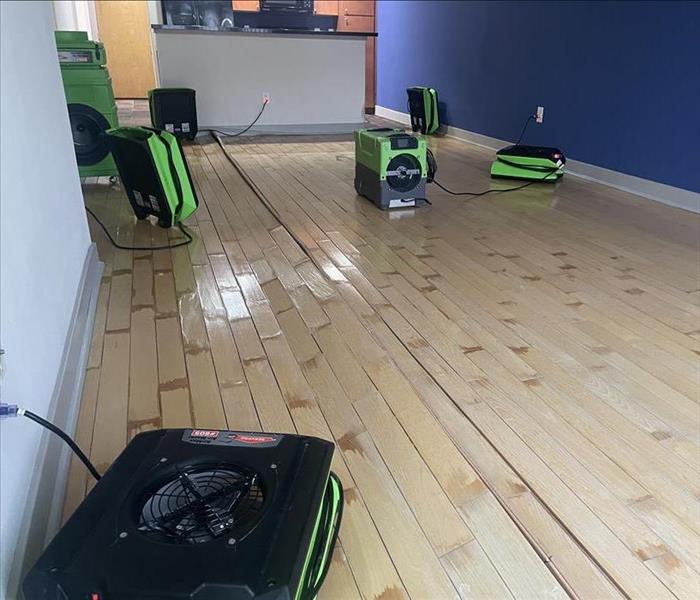 Don’t let water damage define your home—let SERVPRO help you get back on track.
Water damage can be devastating, especially when it affects your cherished furniture and personal belongings. Whether it’s caused by a burst pipe, a leaky roof, or flooding, the damage can feel overwhelming. At SERVPRO®, we understand the emotional and financial impact of water damage, and we’re here to help you restore your possessions to their former glory. In this blog, we’ll guide you through the steps of restoring water-damaged furniture and belongings, ensuring that your home feels like home again.
Assessing the Extent of Damage
The first step in restoring water-damaged furniture and belongings is to assess the extent of the damage. Not all materials react the same way to water exposure. For instance, wooden furniture may swell or warp, while upholstered items might develop stains or odor. Begin by carefully inspecting each item to determine whether it can be salvaged or if it’s beyond repair. Items made of solid wood, metal, and glass are generally more resilient, while particleboard, fabric, and paper-based items may be more challenging to restore.
Drying and Cleaning Techniques
Once you’ve assessed the damage, the next step is to dry out your furniture and belongings as quickly as possible to prevent further deterioration. For wooden furniture, use fans and dehumidifiers to reduce moisture levels gradually. Avoid placing the items in direct sunlight, as this can cause warping. Upholstered furniture and fabrics should be carefully dried and cleaned using specialized equipment like wet-dry vacuums and steam cleaners. If possible, remove cushions and covers to ensure that all moisture is eliminated. It’s crucial to clean and dry these items thoroughly to prevent future issues.
Repairing and Refinishing Furniture
After the drying process, it’s time to focus on repairing and refinishing your water-damaged furniture. For wooden furniture, you may need to sand down rough or swollen areas and apply a fresh coat of paint or varnish to restore its original appearance. If the wood has warped, you might need to use clamps or weights to help it regain its shape. For upholstered furniture, consider reupholstering if the fabric has been heavily damaged, or use fabric cleaners and deodorizers to restore its look and feel. If the water damage is severe, professional restoration services might be necessary to bring your furniture back to life.
Salvaging Personal Belongings
Water damage doesn’t just affect furniture; it can also wreak havoc on personal belongings like books, photographs, and electronics. Salvaging these items requires quick action and careful handling. Books and paper-based items should be gently dried using blotting paper and a low-heat setting on a hairdryer. Photographs should be air-dried on a flat surface, away from direct sunlight. Electronics, on the other hand, should be handled with extreme caution—remove batteries and allow the items to air dry completely before attempting to power them on.
Trust SERVPRO for Professional Restoration
Restoring water-damaged furniture and belongings can be a challenging and time-consuming process. If you’re unsure where to start or if the damage is extensive, trust the professionals at SERVPRO to handle the restoration for you. With our expertise, advanced equipment, and commitment to customer satisfaction, we’ll ensure that your home and belongings are restored to their pre-damage condition as quickly and efficiently as possible. Don’t let water damage define your home—let SERVPRO help you get back on track.
Safe Lighting Solutions for Power Outages: Candles and Alternatives
9/18/2024 (Permalink)
Power outages can be an inconvenient and sometimes dangerous occurrence, especially during severe weather. While candles are a common go-to for emergency lighting, they come with their own set of risks. This blog will provide tips on how to safely use candles and suggest alternative lighting options to keep your home safe and illuminated during power outages.
Candle Safety Tips
- Use Sturdy Holders: Always place candles in sturdy, non-flammable holders to prevent tipping.
- Keep Away from Flammable Objects: Ensure candles are far from curtains, paper, bedding, and other flammable materials.
- Never Leave Unattended: Never leave a burning candle unattended. Extinguish all candles when you leave a room or go to bed.
- Keep Out of Reach of Children and Pets: Place candles in locations where they cannot be easily knocked over by children or pets.
- Use a Candle Snuffer: Use a candle snuffer to extinguish a candle safely instead of blowing it out, which can cause hot wax to splatter.
Alternative Lighting Options
- Flashlights and Lanterns: Battery-operated flashlights and lanterns are a safe and reliable alternative to candles. Ensure you have spare batteries on hand.
- LED Candles: LED candles provide a flameless, safe alternative that mimics the ambiance of real candles.
- Solar-Powered Lights: Charge solar-powered lights during the day and use them indoors at night. They are safe and energy-efficient.
- Rechargeable Lanterns: Rechargeable LED lanterns offer bright, long-lasting light and can be recharged using solar panels or car chargers.
- Glow Sticks: Glow sticks provide safe, temporary lighting and are especially useful for children.
General Power Outage Safety Tips
- Have an Emergency Kit: Keep an emergency kit with flashlights, batteries, a first aid kit, and non-perishable food items.
- Use Generators Safely: If using a generator, place it outside and away from windows to avoid carbon monoxide poisoning.
- Unplug Appliances: Unplug appliances and electronics to prevent damage from power surges when electricity is restored.
- Stay Informed: Use a battery-powered or hand-crank radio to stay informed about weather updates and power restoration efforts.
Creating a Safe Lighting Plan
- Identify Safe Zones: Choose specific areas in your home where you will use candles or alternative lighting. Ensure these areas are free from clutter and flammable materials.
- Centralize Lighting: Use a central location for your primary light source to maximize its effectiveness and minimize the number of light sources needed.
- Set Up Safe Candle Stations: If you must use candles, set up designated candle stations equipped with sturdy holders, a snuffer, and placed on a non-flammable surface.
- Educate Family Members: Ensure all family members, including children, understand the safe use of candles and alternative lighting options.
Preparing for Future Power Outages
- Regularly Check Supplies: Periodically check your emergency lighting supplies to ensure everything is in working order and replace batteries as needed.
- Invest in Rechargeable Options: Consider investing in rechargeable lighting solutions that can be powered by solar energy or hand-cranks.
- Plan Ahead: Develop a power outage plan with your family, outlining safe lighting practices and ensuring everyone knows their role in an emergency.
While candles can provide essential lighting during a power outage, they must be used with caution to avoid potential hazards. Exploring alternative lighting options like flashlights, LED candles, and solar-powered lights can enhance safety and provide reliable illumination. By following these tips and preparing in advance, you can keep your home safe and well-lit during power outages. Stay safe, stay prepared, and remember that safety should always be your top priority.
Safeguarding Your Space: Tips to Prevent Garage Fires and SERVPRO’s Role in Restoration
8/7/2024 (Permalink)
The garage is often a multifunctional space—a place to park vehicles, store tools, and even work on DIY projects. However, it's also a common area for fires to occur, due to the presence of flammable materials and electrical appliances. Preventing garage fires requires vigilance and proactive measures. In this blog, we'll explore practical tips for preventing garage fires and highlight the importance of professional fire damage restoration services, such as those offered by SERVPRO of Johnston County North.
Preventing Garage Fires
Proper Storage: Store flammable materials such as gasoline, paint, and propane cylinders in designated, well-ventilated areas away from heat sources and electrical outlets. Use approved containers and secure lids tightly.
Electrical Safety: Avoid overloading electrical outlets and circuits in the garage. Inspect electrical cords and appliances regularly for signs of wear or damage, and replace them as needed. Consider installing ground fault circuit interrupters (GFCIs) for added protection.
Smoking Safety: Discourage smoking in the garage, as discarded cigarette butts can ignite flammable materials. Provide designated smoking areas outside the garage, equipped with fireproof receptacles.
Clear Clutter: Keep the garage tidy and free of clutter to minimize fire hazards. Avoid storing combustible materials such as cardboard boxes, newspapers, and old furniture in the garage.
Fire Extinguisher: Keep a multipurpose fire extinguisher rated for Class A, B, and C fires in an easily accessible location in the garage. Familiarize yourself with its operation and conduct regular inspections to ensure it is in good working condition.
Regular Maintenance: Schedule regular maintenance checks for garage doors, electrical systems, and appliances to identify and address potential fire hazards promptly. Replace worn components and faulty equipment as needed.
SERVPRO’s Role in Fire Damage Restoration
Emergency Response: In the event of a garage fire, prompt action is crucial to minimize damage and prevent further destruction. SERVPRO® offers 24/7 emergency response services to mitigate fire damage and begin the restoration process immediately.
Assessment and Cleanup: Trained technicians conduct a thorough assessment of the fire damage to determine the extent of the cleanup and restoration needed. They use specialized equipment and techniques to remove soot, smoke residue, and odors from the garage and its contents.
Structural Repairs: SERVPRO handles all aspects of fire damage restoration, including structural repairs and reconstruction. From repairing charred walls and ceilings to replacing damaged insulation and flooring. We restore the garage to its pre-fire condition safely and efficiently.
Content Restoration: SERVPRO offers content cleaning and restoration services to salvage belongings damaged by fire and smoke. Whether it's clothing, tools, or sentimental items, we employ advanced cleaning techniques to restore items whenever possible.
Preventing garage fires requires diligence and adherence to safety protocols. By implementing these preventive measures and being proactive in fire safety practices, you can reduce the risk of fire in your garage and protect your property and belongings. In the unfortunate event of a fire, trust SERVPRO of Johnston County North for professional fire damage restoration services to help you recover and restore your garage to its former glory.
Mold in Insulation: Causes and Remediation Techniques
7/17/2024 (Permalink)
Mold is an unwelcome intruder that can wreak havoc on any property,causing structural damage and more. One area where mold commonly hides is within insulation. Mold growth in insulation can compromise the efficiency of your home's insulation and pose a threat to indoor air quality. In this blog post, we'll delve into the causes of mold in insulation and explore effective remediation techniques to safeguard your property.
Causes of Mold in Insulation
Mold can form just about anywhere for a multitude of reasons. Let’s discuss some of them and get to know the problem better.
Moisture Intrusion
Moisture is the primary culprit behind mold growth in insulation. Leaky roofs, plumbing issues, and poor ventilation can all lead to excess moisture buildup in attics, walls, and crawl spaces, creating the perfect environment for mold to thrive.
Poor Installation
Improperly installed insulation can create pockets where moisture gets trapped, promoting mold growth over time. Insufficient sealing or gaps in insulation can also allow moisture to seep in, further exacerbating the problem.
High Humidity Levels
Regions with high humidity levels are more prone to mold growth in insulation. Without adequate ventilation and moisture control measures, humid air can infiltrate insulation materials, providing an ideal breeding ground for mold spores.
Remediation Techniques
When you are presented with a mold issue, hope is not lost! Let’s dive into some things you can do about it.
Identify and Address Moisture Sources
The first step in remedying mold in insulation is to identify and eliminate sources of moisture. This may involve repairing leaks, improving ventilation, or installing moisture barriers to prevent further water intrusion.
Remove Affected Insulation
In cases where mold growth has penetrated insulation materials, removal may be necessary to prevent further spread. Professional remediation experts can safely remove and dispose of contaminated insulation, ensuring thorough cleaning of affected areas.
Install Proper Ventilation
Proper ventilation is essential for maintaining optimal indoor air quality and preventing moisture buildup. Installing vents, exhaust fans, or dehumidifiers can help regulate humidity levels and inhibit mold growth in insulation and other susceptible areas.
Replace Insulation
After removing contaminated insulation, it's crucial to replace it with high-quality, mold-resistant materials. Choose insulation products specifically designed to withstand moisture and inhibit mold growth to safeguard your property against future infestations.
Mold in insulation can compromise the integrity of your home's structure and more. By understanding the causes of mold growth in insulation and implementing effective remediation techniques, you can protect your property and ensure a safe, living environment for years to come. If you suspect mold infestation in your insulation, don't hesitate to seek professional assistance from SERVPRO® experts for comprehensive mold remediation solutions tailored to your needs.
Tackling The 5 Most Common Plumbing Problems: Solutions for Homeowners
6/13/2024 (Permalink)
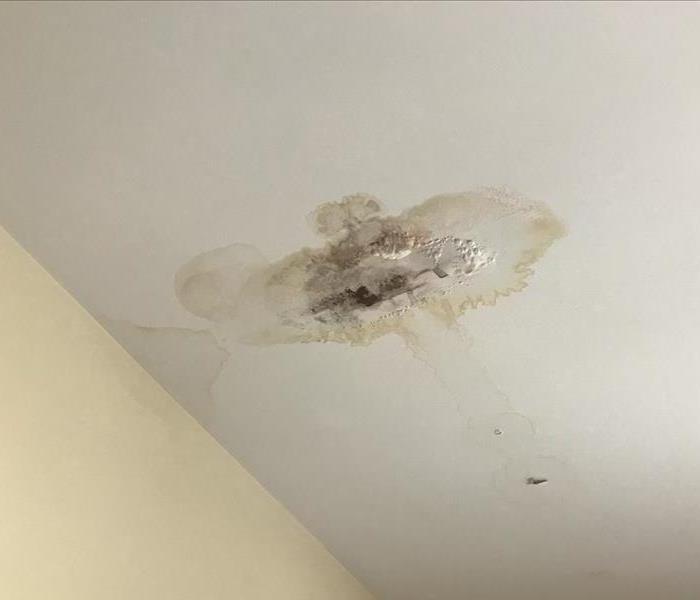 If you encounter a plumbing problem that you're unable to fix on your own, don't hesitate to contact a professional plumber for assistance.
Plumbing issues can cause headaches for homeowners, but with the right knowledge and tools, many common problems can be resolved without the need for professional assistance. In this blog post, we'll discuss some of the most frequent plumbing issues faced by homeowners and provide practical tips on how to troubleshoot and fix them.
Clogged Drains
One of the most common plumbing problems is a clogged drain, which can occur in sinks, showers, or toilets. To unclog a drain, start by using a plunger to create suction and dislodge the blockage. If that doesn't work, try using a drain snake or auger to break up and remove the obstruction. For stubborn clogs, consider using a chemical drain cleaner, but use caution and follow the manufacturer's instructions carefully.
Leaky Faucets
Leaky faucets are not only annoying but can also waste a significant amount of water if left unrepaired. To fix a leaky faucet, start by turning off the water supply to the affected fixture. Then, disassemble the faucet and inspect the components for signs of wear or damage, such as worn-out washers or O-rings. Replace any damaged parts and reassemble the faucet, ensuring a tight seal to prevent future leaks.
Running Toilet
A running toilet is another common plumbing problem that can waste water and increase your utility bills. To fix a running toilet, start by checking the flapper valve and chain inside the tank to ensure they are functioning properly. Adjust or replace the flapper valve as needed to create a tight seal. If the problem persists, check the fill valve and adjust the water level in the tank to prevent constant running.
Low Water Pressure
Low water pressure can make it difficult to perform everyday tasks such as showering or washing dishes. To troubleshoot low water pressure, start by checking the aerators on your faucets and showerheads for mineral buildup or debris. Clean or replace the aerators if necessary to improve water flow. If the problem persists, check for leaks in the plumbing system and inspect the main water shut-off valve to ensure it is fully open.
Burst Pipes
Burst pipes can cause extensive water damage to your home if not addressed promptly. If you suspect a burst pipe, shut off the main water supply to your home immediately to prevent further flooding. Then, locate the burst pipe and carefully inspect it for damage. Depending on the severity of the damage, you may need to patch the pipe with epoxy putty or replace the affected section altogether.
By understanding how to identify and address common plumbing issues, homeowners can save time and money on costly repairs and maintenance. However, if you encounter a plumbing problem that you're unable to fix on your own, don't hesitate to contact a professional plumber for assistance. With the right tools and know-how, you can keep your plumbing system in top condition and avoid disruptions to your daily routine.
Flood Defense 101: Understanding Flood Barriers and Sandbags
5/15/2024 (Permalink)
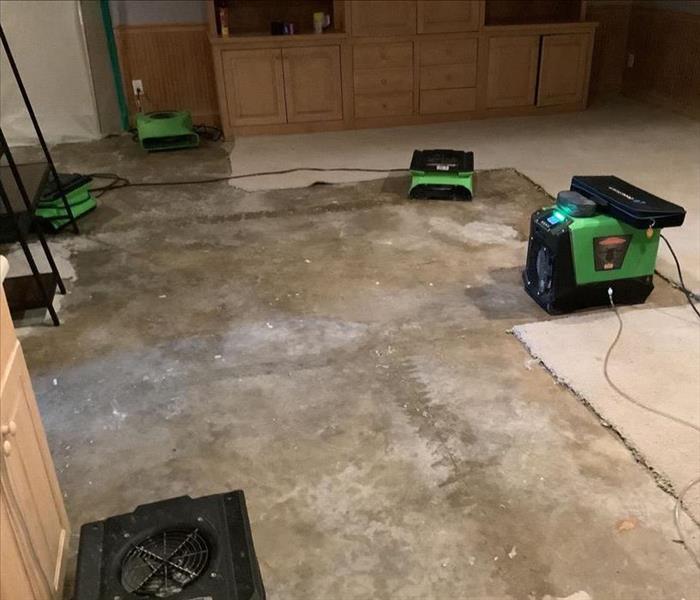 By understanding how these flood defense measures work, homeowners can mitigate the risk of flood-related losses and protect their homes.
When it comes to protecting properties from flooding, flood barriers, and sandbags are essential tools in a homeowner's arsenal. In this guide, we'll delve into the functionality and effectiveness of flood barriers and sandbags, exploring how they can be used to mitigate flood damage and safeguard homes and businesses.
1. Understanding Flood Barriers
Flood barriers are engineered structures designed to prevent or mitigate the ingress of floodwater into buildings and properties. They come in various forms, including temporary barriers, permanent levees, and inflatable dams. Temporary barriers are often made of materials such as steel, aluminum, or reinforced concrete, while inflatable dams utilize air or water to create a barrier against rising floodwaters.
2. How Flood Barriers Work
Temporary flood barriers are typically deployed in advance of an impending flood event and are designed to be quickly erected and removed as needed. They create a physical barrier between the floodwater and the property, diverting water away from vulnerable areas. Permanent levees, on the other hand, are constructed using durable materials and are built to withstand frequent or recurring flood events.
3. Benefits of Sandbags
Sandbags are a traditional and cost-effective flood mitigation measure commonly used to reinforce flood barriers and protect against localized flooding. When properly filled and stacked, sandbags can create a sturdy barrier that helps to divert or absorb floodwaters. They are versatile, easy to transport, and can be quickly deployed in emergencies.
4. Proper Sandbag Placement
To maximize the effectiveness of sandbags, it's essential to place them strategically around the perimeter of the property, focusing on vulnerable areas such as doors, windows, and low-lying entry points. Start by laying a base layer of sandbags to create a stable foundation, then stack subsequent layers in a staggered pattern to create a strong and watertight barrier.
5. Maintenance and Inspection
Regular maintenance and inspection of flood barriers and sandbags are essential to ensure their effectiveness when needed. Inspect barriers for signs of wear, damage, or deterioration, and replace any damaged components promptly. Store sandbags in a dry and accessible location, and replenish supplies as needed to maintain readiness for future flood events.
6. Integrated Flood Defense Systems
In addition to flood barriers and sandbags, homeowners can also implement integrated flood defense systems that combine various mitigation measures, such as drainage systems, sump pumps, and elevation techniques. By combining multiple strategies, property owners can enhance flood resilience and minimize the risk of flood damage.
Flood barriers and sandbags are invaluable tools for protecting properties from flood damage and minimizing the impact of inundation. By understanding how these flood defense measures work and implementing them effectively, homeowners can mitigate the risk of flood-related losses and protect their homes and businesses against the devastating effects of flooding. Stay prepared, stay vigilant, and stay safe.
Understanding the Risks: Smoking Indoors and Its Impact on Your Home
4/11/2024 (Permalink)
Smoking indoors may seem like a harmless habit, but the reality is that it poses significant risks to both your health and the condition of your home. From lingering odors to increased fire hazards, smoking indoors can have far-reaching consequences that impact both occupants and property alike. Let's explore the dangers of smoking in the home and why it's essential to kick this habit to the curb.
Indoor Air Quality Concerns
One of the most immediate dangers of smoking indoors is its impact on indoor air quality. Cigarette smoke contains a complex mixture of harmful chemicals and carcinogens, many of which can linger in the air long after the cigarette has been extinguished. Over time, exposure to secondhand smoke can lead to a variety of problems for occupants, particularly children and pets who may be more susceptible to its effects.
Damage to Interior Surfaces
Smoking indoors can also take a toll on the condition of your home's interior surfaces. Tar and nicotine residues from cigarette smoke can accumulate on walls, ceilings, and furnishings, causing discoloration, staining, and unpleasant odors. These residues can be challenging to remove and may require extensive cleaning or even repainting to restore the affected surfaces to their original condition.
Increased Fire Risk
Smoking indoors significantly increases the risk of accidental fires. Carelessly discarded cigarette butts or hot ashes can ignite flammable materials such as upholstery, bedding, or curtains, leading to potentially devastating fires. Moreover, smoking indoors near oxygen tanks or other flammable materials can further heighten the risk of fire and pose serious safety hazards for occupants.
Property Devaluation
In addition to the health and safety concerns, smoking indoors can also devalue your property. Lingering odors from cigarette smoke can be off-putting to potential buyers and may make it more challenging to sell your home. Even if you're not planning to sell, the presence of cigarette odors can detract from your enjoyment of your living space and create an unwelcoming environment for guests.
In conclusion, smoking indoors poses significant risks to both occupants and property alike. From compromised indoor air quality to increased fire hazards and property devaluation, the dangers of smoking in the home are clear. If you're a smoker, consider taking steps to quit or, at the very least, smoke outdoors to minimize the risks to yourself and your home. By prioritizing the health and safety of your household, you can create a healthier, safer, and more enjoyable living environment for everyone.
Mold-Resistant Paints and Coatings: Do They Work?
3/13/2024 (Permalink)
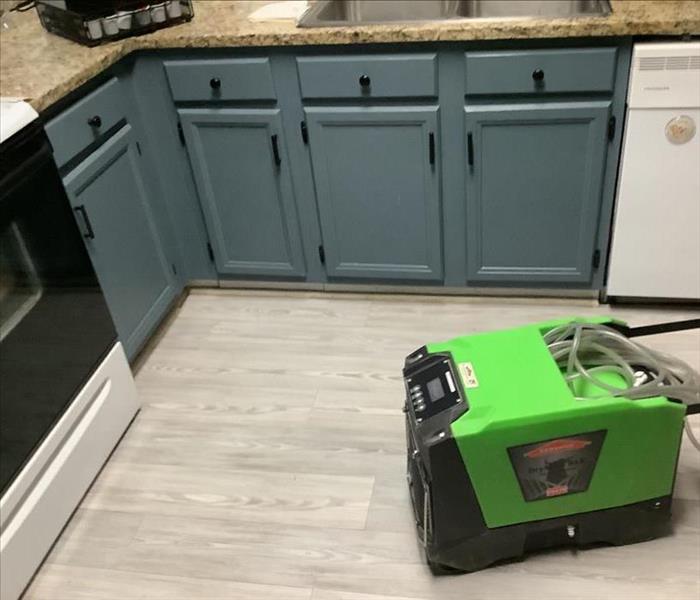 Mold-resistant paints and coatings have been introduced in the market as a solution to prevent mold growth on walls and surfaces.
Mold issues are a significant concern for homeowners and business owners alike. Preventing mold growth is crucial to maintaining a safe environment. Mold-resistant paints and coatings have been introduced in the market as a solution to prevent mold growth on walls and surfaces. In this blog, we will explore how mold-resistant paints and coatings work and what types of options are available in the market to prevent mold damage.
How Does Mold-Resistant Paint and Coating Work?
Mold-resistant paint and coatings are developed to prevent mold growth on surfaces. These types of paints or coatings contain antimicrobial agents that limit the growth of fungi that cause mold damage. The antimicrobial agents typically used in mold-resistant paints and coatings are designed to adhere to the paint's surface and prevent the growth of mold spores.
Mold-resistant paint and coatings make the surfaces where they're applied more resistant to dampness, which is the primary factor for mold growth. The paint's antimicrobial properties prevent mold spores from taking root on the surface, making it a primary defense against mold growth.
Types of Options Available
Several types of mold-resistant paints and coatings are available on the market. Here are some of the options:
- Latex Paint with Antimicrobial Properties: Latex paint infused with antimicrobial agents is a common type of mold-resistant paint. The paint itself contains biocides that help combat the growth of fungi, making it effective against mold.
- Epoxy Paint for High-Humidity Areas: Epoxy paints are particularly effective in high-humidity areas, such as basements, bathrooms, and laundry rooms. These types of paints form a barrier that is difficult for mold spores to penetrate.
- Hybrid Paint and Primer: Hybrid paint and primer paint is an all-in-one solution that combines the benefits of both paint and primer to provide enhanced resistance to mold. This type of paint is designed to bond firmly to surfaces, sealing them against moisture.
- Natural Mineral Paint: This type of paint uses a natural mineral ingredient like potassium silicate to provide mold resistance. Such paints are best suited for outdoor use and can be highly effective against dampness and humidity.
- Coating for Industrial and Commercial Spaces: Industrial and commercial spaces are especially prone to mold growth due to their size and high levels of moisture. Mold-resistant coatings offer an effective solution that can be applied to concrete, metal, or wood surfaces.
- Anti-Microbial Additives: Anti-microbial additives are another option for mold resistance. These additives can be mixed with paint or coatings, providing mold resistance to prevent any future growth.
The Benefits of Using Mold-Resistant Paint and Coating
Mold-resistant paints and coatings are an excellent investment for homeowners and business owners who want to prevent further mold damage. Here are some benefits of using mold-resistant paint and coating:
- Prevent Future Mold Growth: Mold-resistant paint and coating products contain mold-inhibiting chemicals that stop mold growth from taking hold on walls or surfaces in the first place.
- Durable and Lasting: Mold-resistant products can offer long-lasting protection against mold growth. They can hold up against harsh environmental conditions and are highly resistant to water.
- Cost-Effective: While mold-resistant paint and coatings may cost more than traditional paint products, they can offer significant savings in the long run. By preventing mold growth, property and building owners can save money in terms of repairs and remediation costs.
Fighting Mold with Paint
Mold issues are a significant problem for any property owner. Fortunately, mold-resistant paint and coating provide a simple and effective solution to prevent mold growth. Mold-resistant products come in various options, each designed for specific surfaces or environments. They provide long-lasting and cost-effective protection against mold growth. Investing in mold-resistant paint and coating can provide peace of mind that your property is protected from the risk of future mold damage.

 24/7 Emergency Service
